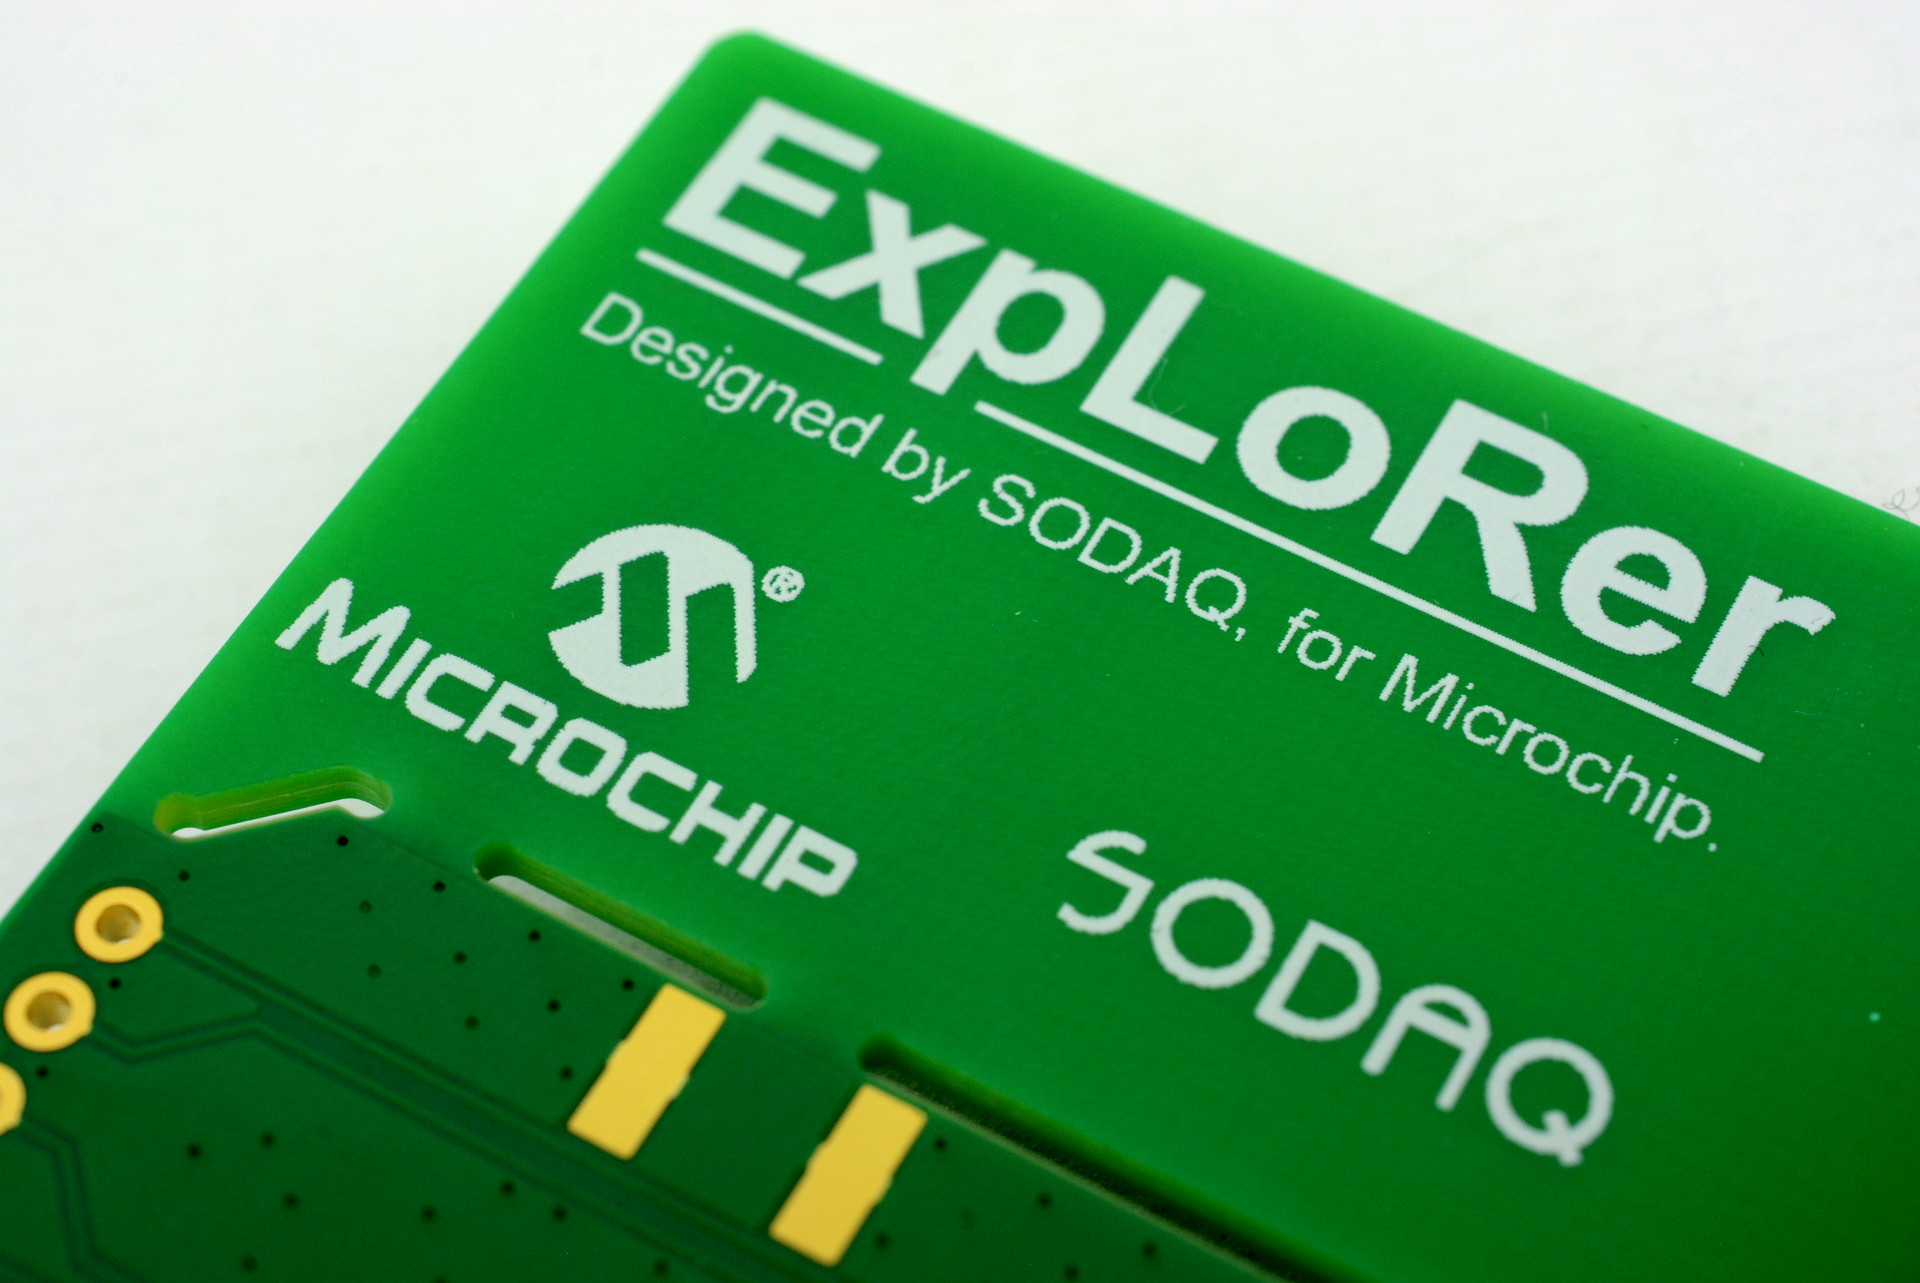
Pocketable LoRaWAN development platform from SODAQ and Microchip combines Arduino ease with all the features needed to start developing fully untethered applications right away.
A little while Microchip were kind enough to send us a SODAQ Explorer board and the other night I finally got round to running up some simple examples. And I must say that I’m a fan of the little board, which packages together the features required for fully untethered experimentation with ease of use via the novice friendly Arduino IDE, in a highly convenient form factor.
Hardware
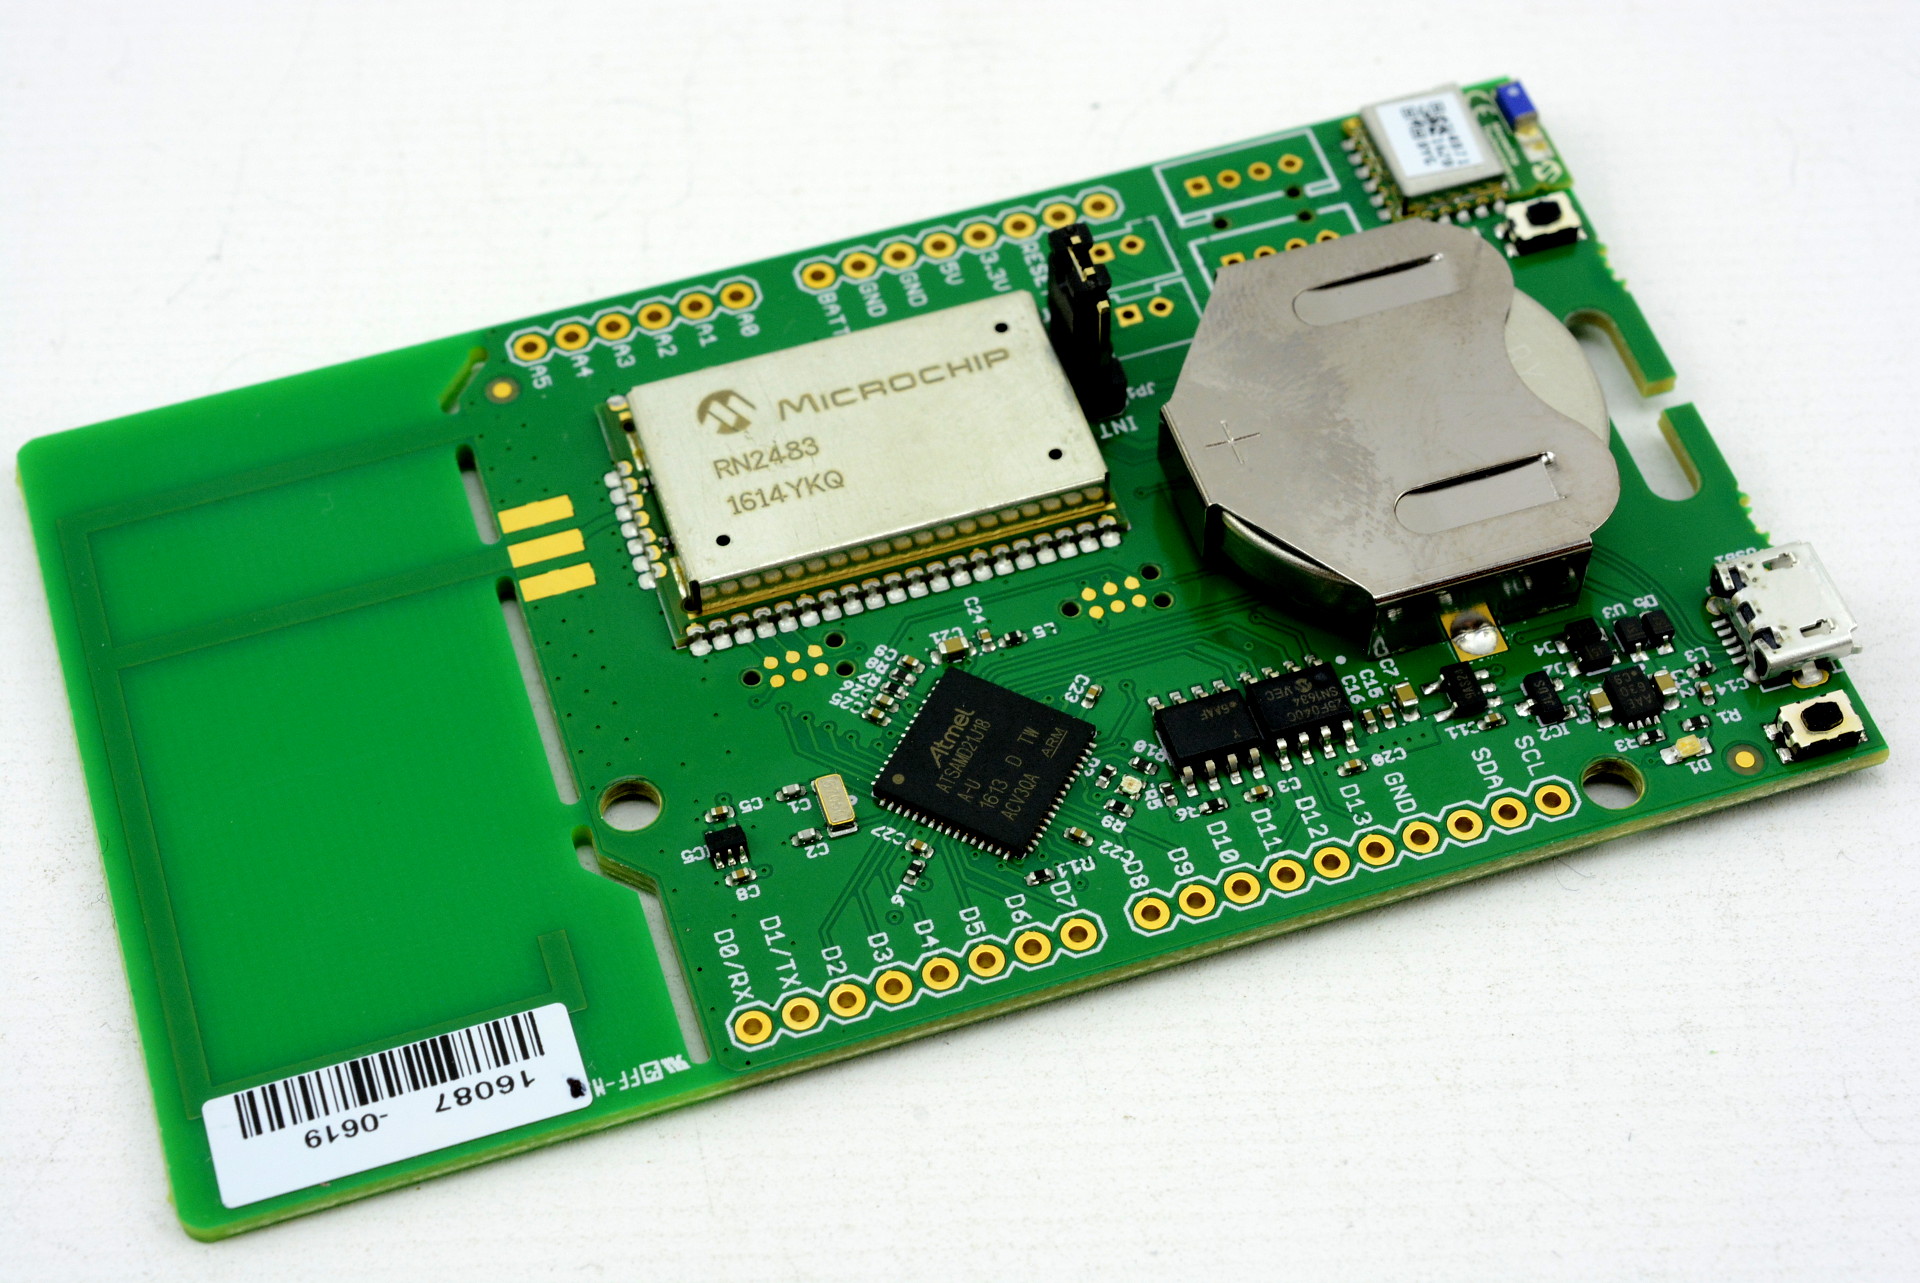
The Explorer is based around an Microchip SAM D21 low power microcontroller that features an ARM Cortex M0+ core. The same MCU platform that is used with official Arduino boards such as the Zero and MKR1000, and which provides a good step up from the veritable 8-bit AVR platform used with classic Arduino boards such as the UNO.
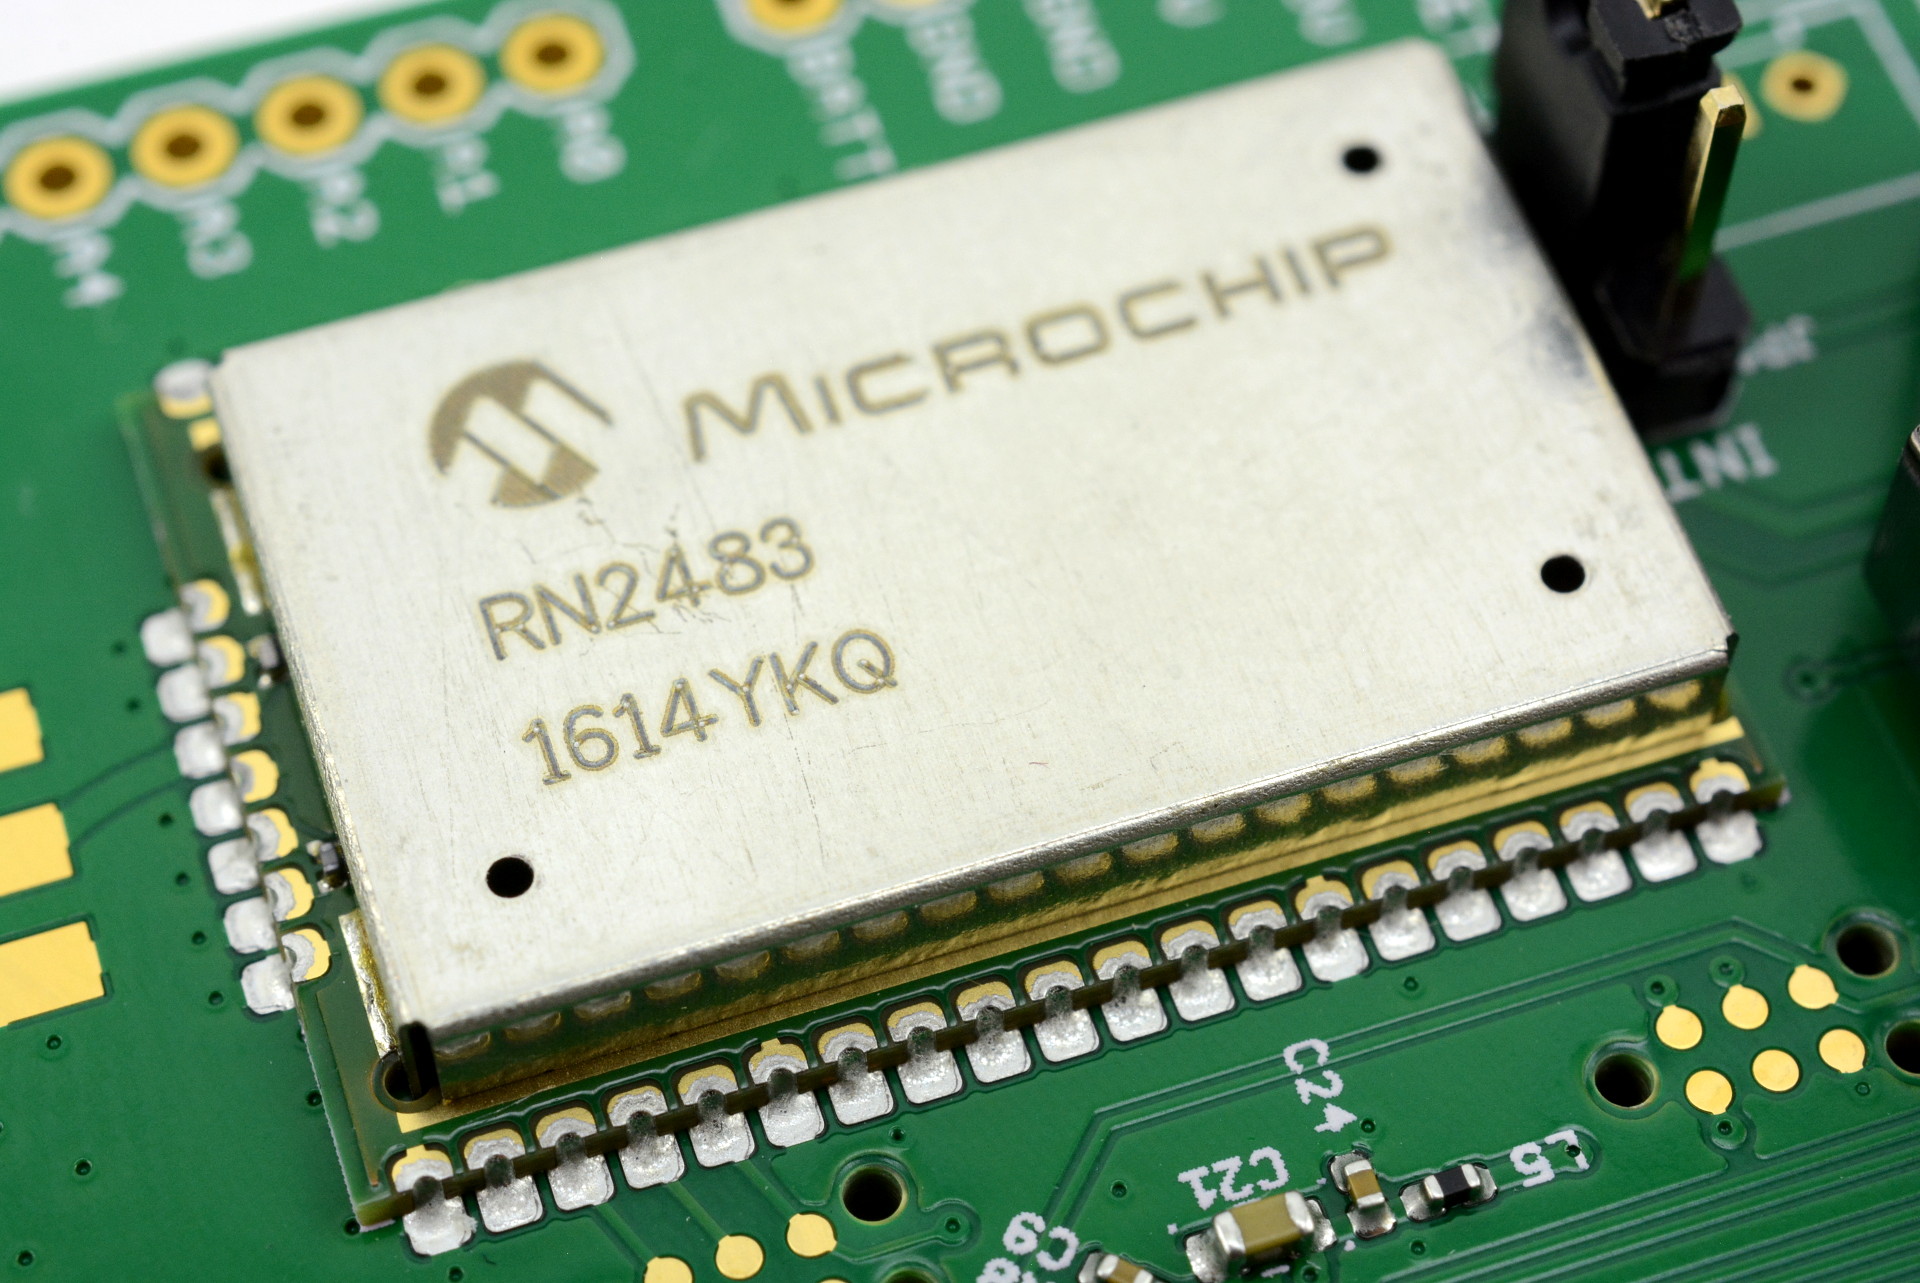
LoRaWAN capabilities come courtesy of the RN2483 module, which integrates a radio, processor and fully certified stack, into a module with a convenient UART interface and simple command set.
Key features of the board include:
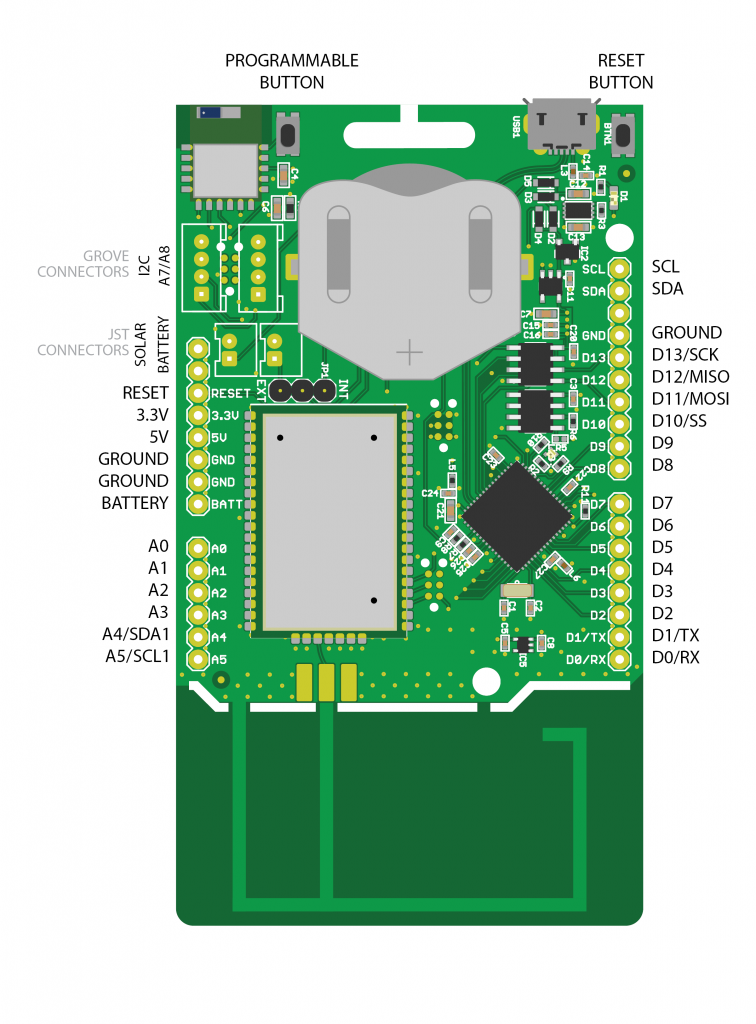
- ATSAMD21J18, 32-Bit ARM Cortex M0+ at 48MHz
- 32KB SRAM
- 256 KB and 4MB (external) flash memory
- Microchip RN2483 LoRa(WAN) Module
- I/O:
- 20x with external interrupts available on all pins
- 10-bit DAC
- Power:
- Supply via USB power and/or 3.7 LiPo battery
- Solar charge controller with up to 500mA charge current
- Peripherals:
- RGB LED, Blue LED
- ATECC508A cryptographic IC
- Microchip RN4871 Bluetooth module
- MCP9700AT temperature sensor
At 93 x 55 mm the board can easily be slipped into a shirt pocket or, thanks to a routed out section adjacent to the battery, attached to a lanyard. Speaking of batteries, it comes provided with a 3.6V 20mAh Lithium-ion coin cell, allowing you to quickly validate working range and certain applications, without having to hook up an external battery. For more prolonged use a solar panel can be attached and/or a larger external battery via JST connectors.
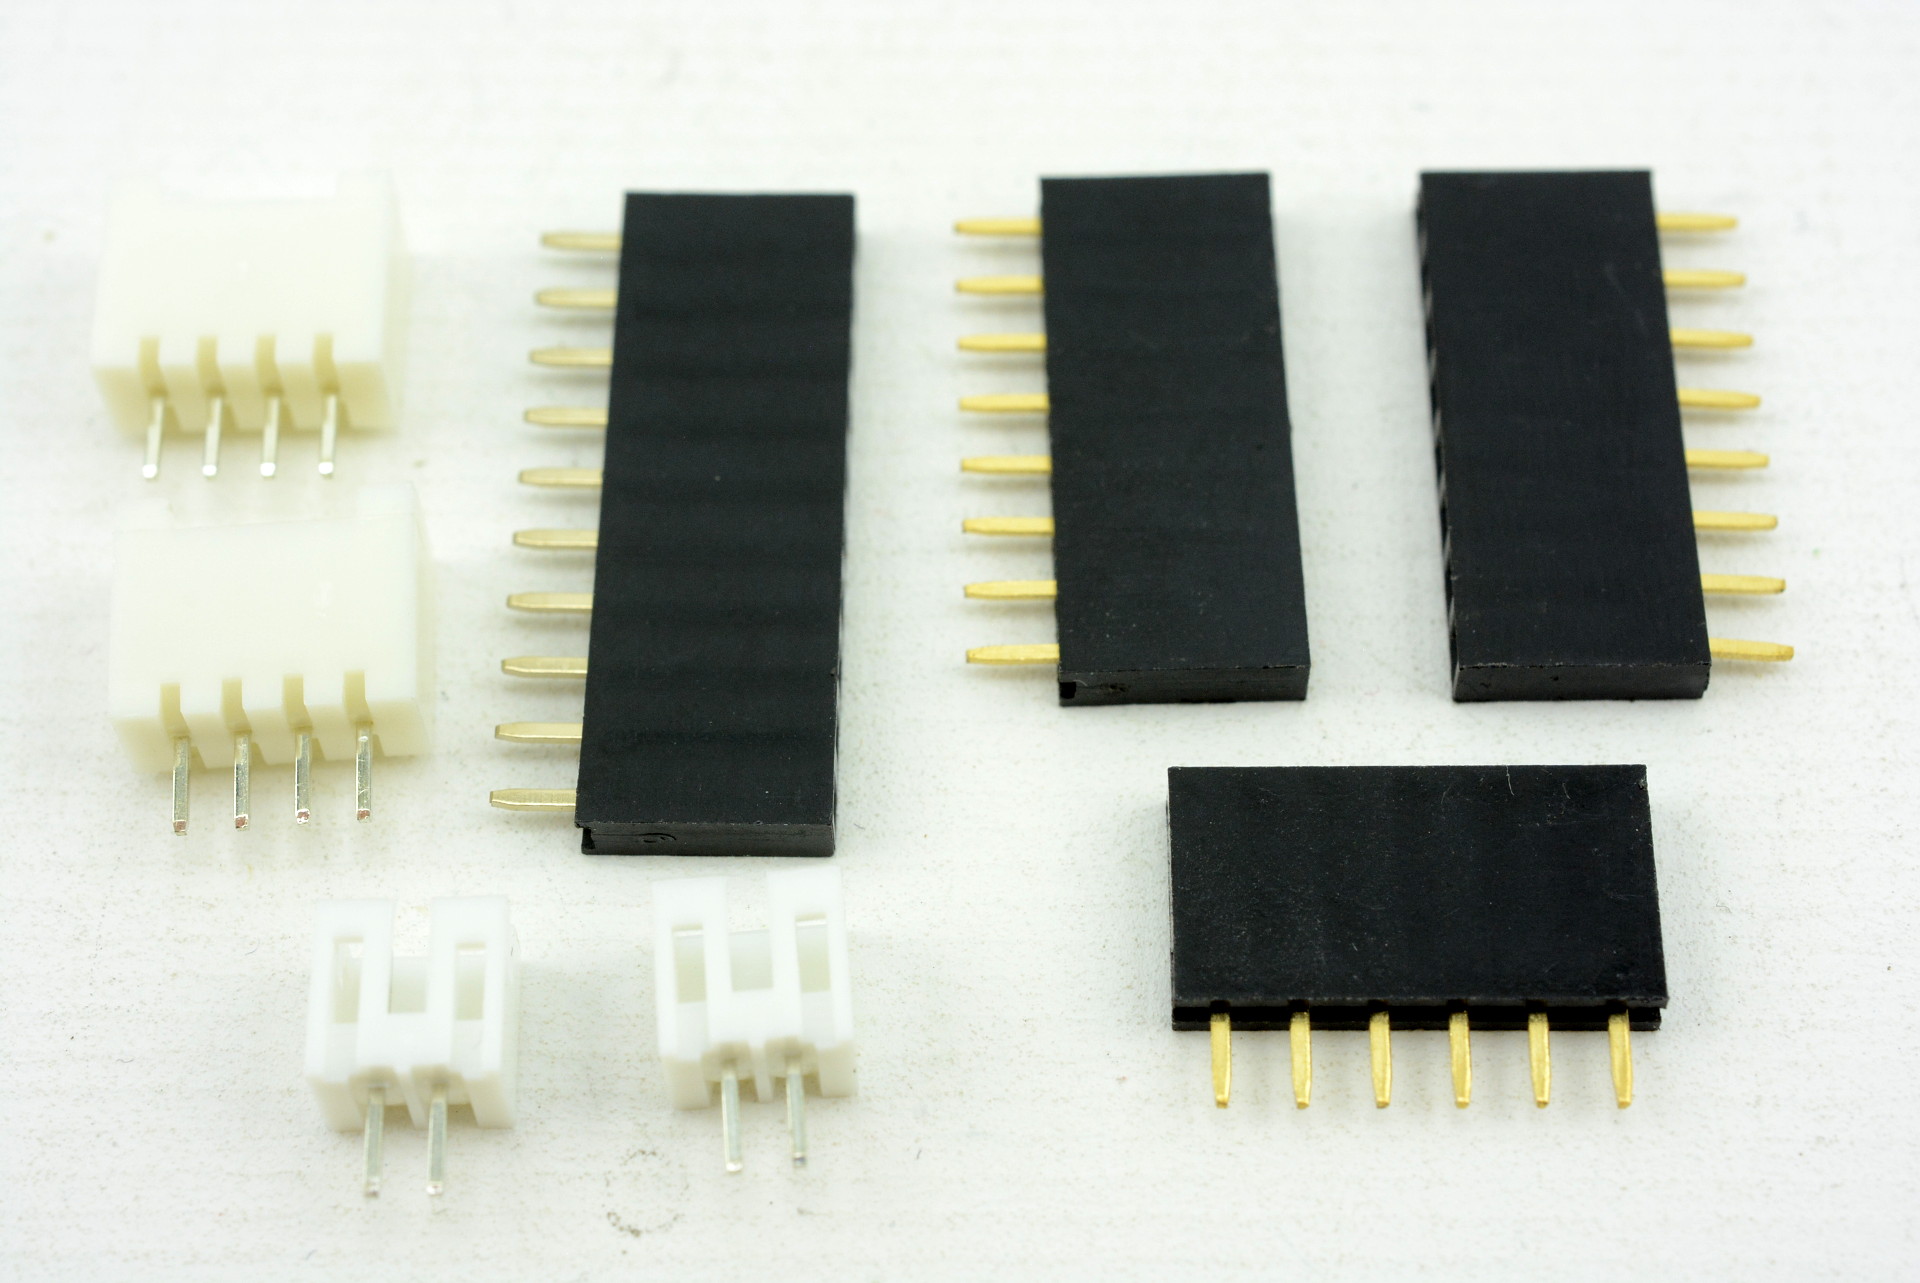
By default JST connectors and Arduino headers are not fitted, but they are supplied and should they be required soldering them in would take no time at all.
Another nice touch is the break-away PCB antenna that can be snapped off to allow an edge launch SMA socket to be fitted in its place; a neat solution to supporting both on-board and external antenna use cases.
Arduino IDE
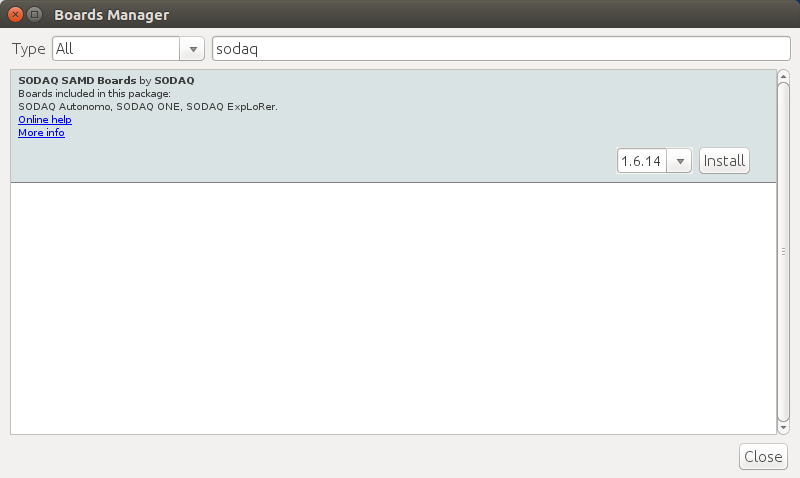
Once you’ve added a URL to the Arduino Boards Manager configuration support for SODAQ SAMD Boards can be added with just a few clicks.
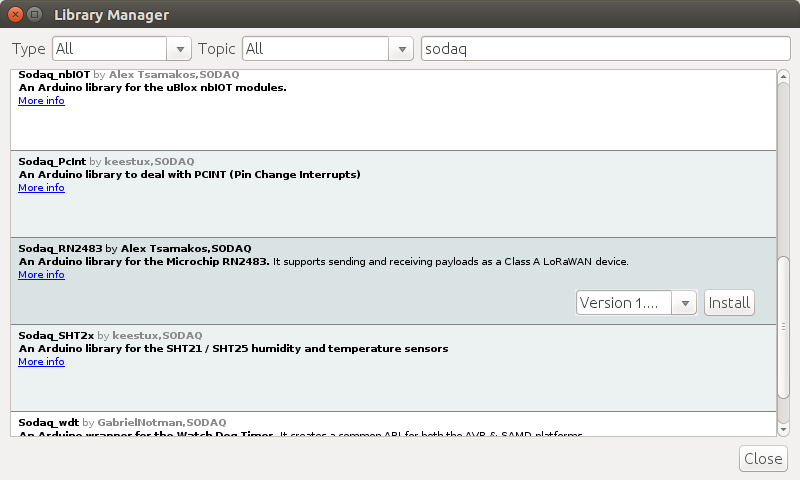
Similarly, a few clicks later and library support is added for the Microchip RN2483 module.
Simple example
After installing support for a particular board family the first place I’d then look for examples is in the IDE under File → Examples → Platform. However, while examples are provided here for the Explorer, they tend to use devices on external breakout boards that interfaced via I2S and SPI etc. Fear not though, as the SODAQ website has more under ExpLoRer → Example Sketches. This did catch me out for a minute as it is easy to miss the second level menu option.
Heading straight for the LoRaWAN examples I first ran up the one to get the HWEUI from the RN2483 module, so that the device could be provisioned on The Things Network. One thing to note here is that at the time of writing it appears that there is a typo in the sketch and the first elif should be an else — perhaps at one point it support additional designs.
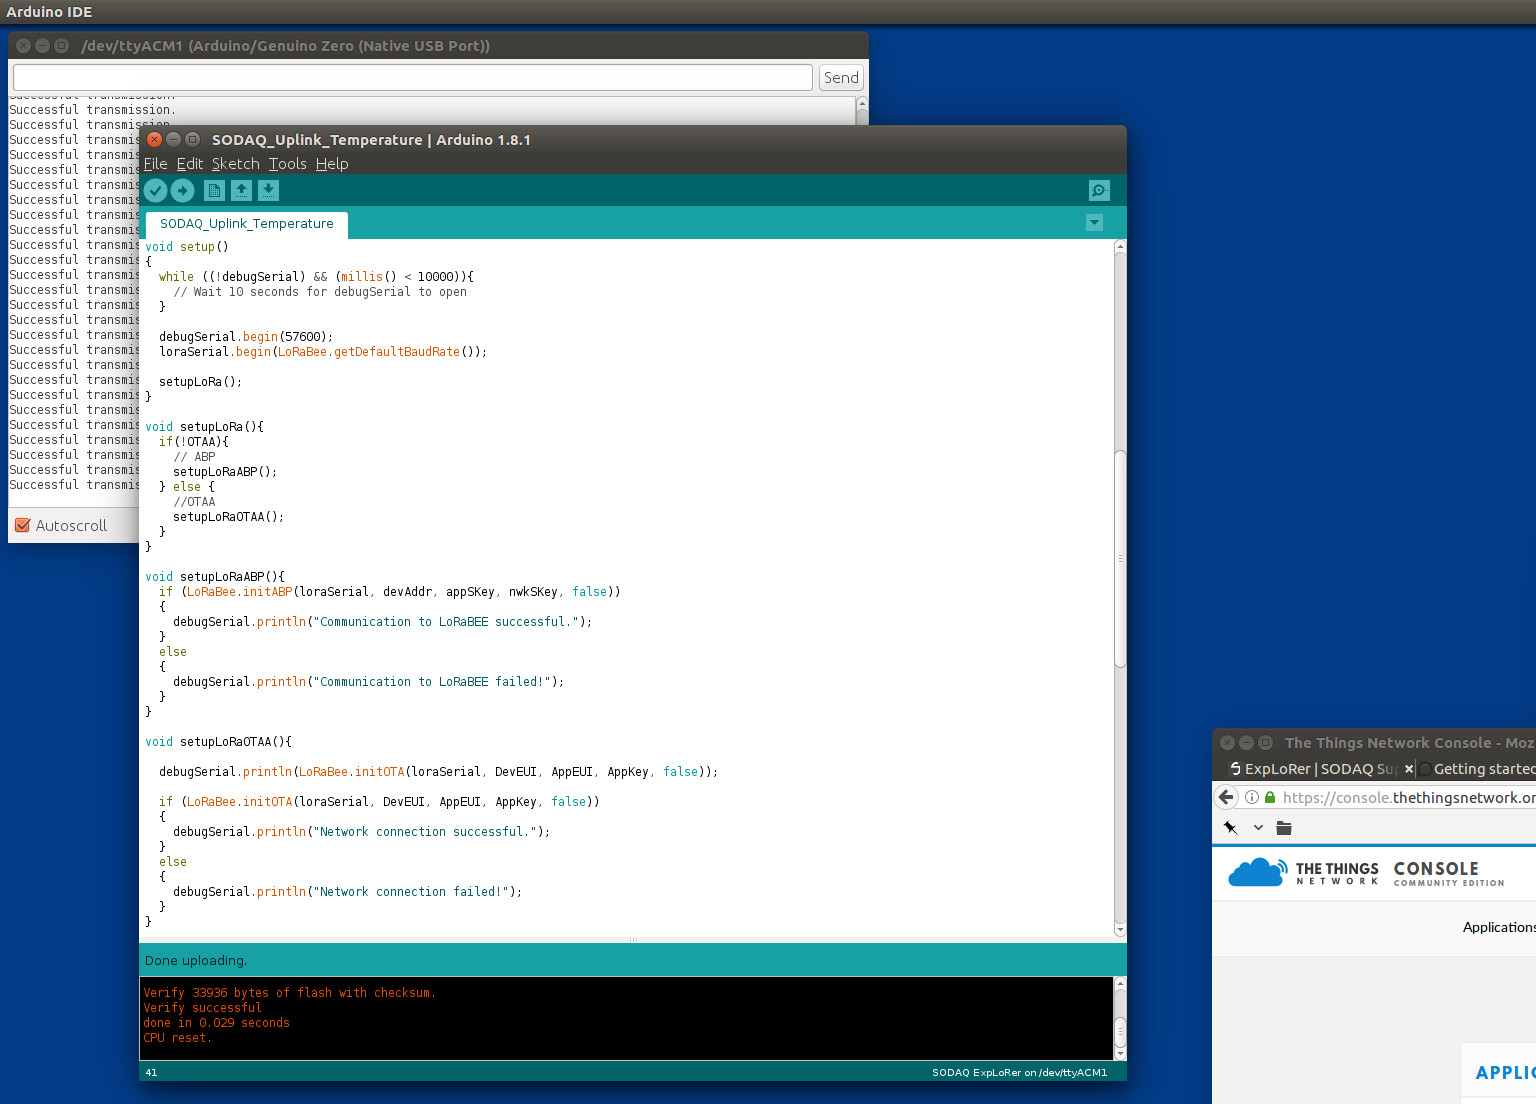
Once I had the HWEUI it took only moments to create a new application in the TTN Console and register the device to it. Following which I took Send Temperature with LoRaWAN example, configured the DevEUI, AppEUI and AppKey in the sketch, while making sure to also change the default of bool OTAA = false to bool OTAA = true (alternatively I could have provisioned the device in the Console using ABP instead).
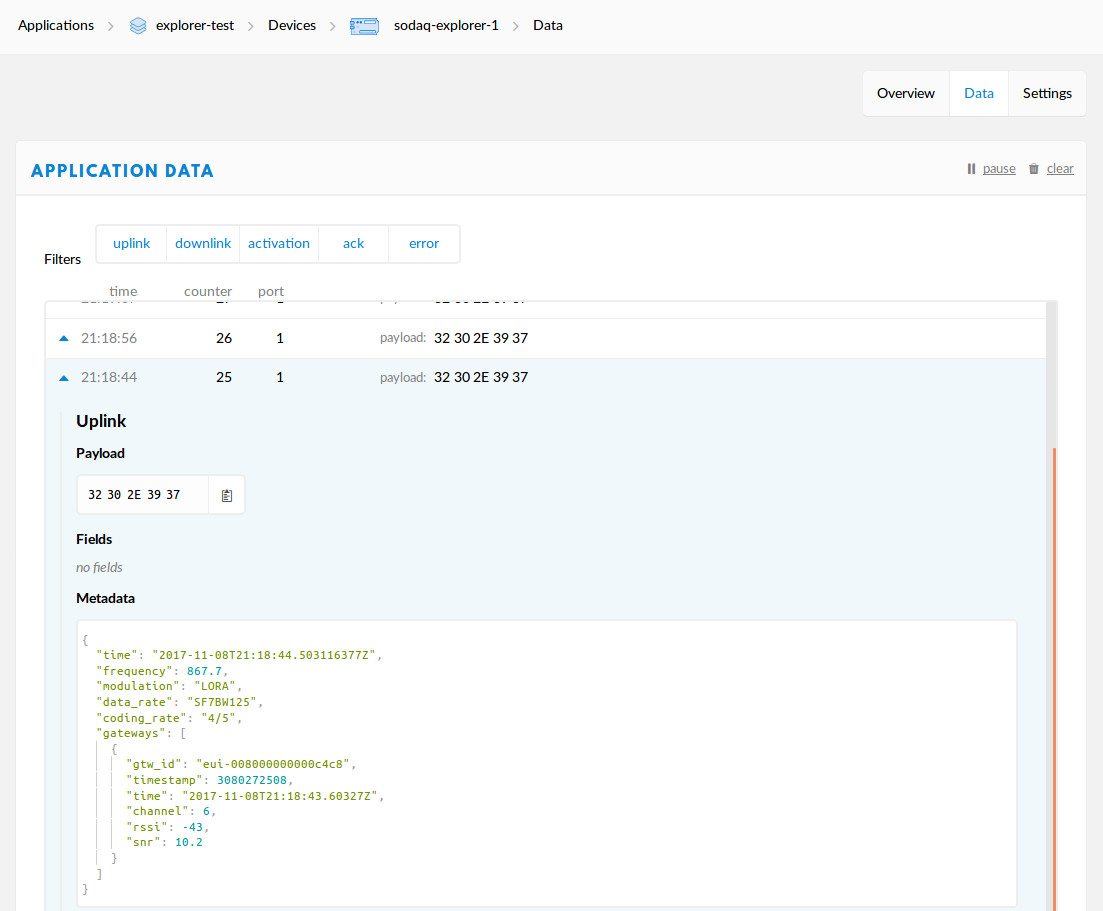
Following upload there was a short delay before the device successfully registered on the network via OTAA and then data was sent via uplink at 60 second intervals.
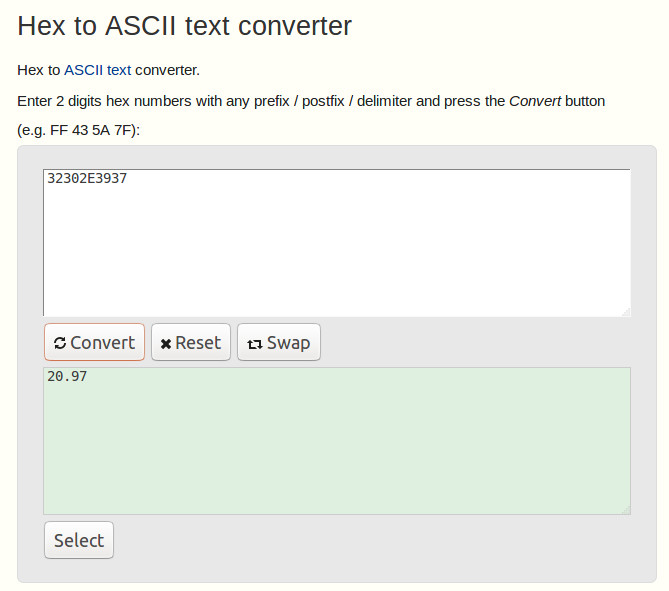
The uplink payload was quickly entered into an online hex-to-ASCII converter and, sure enough, a temperature reading in degrees centigrade was obtained.
Taking it further
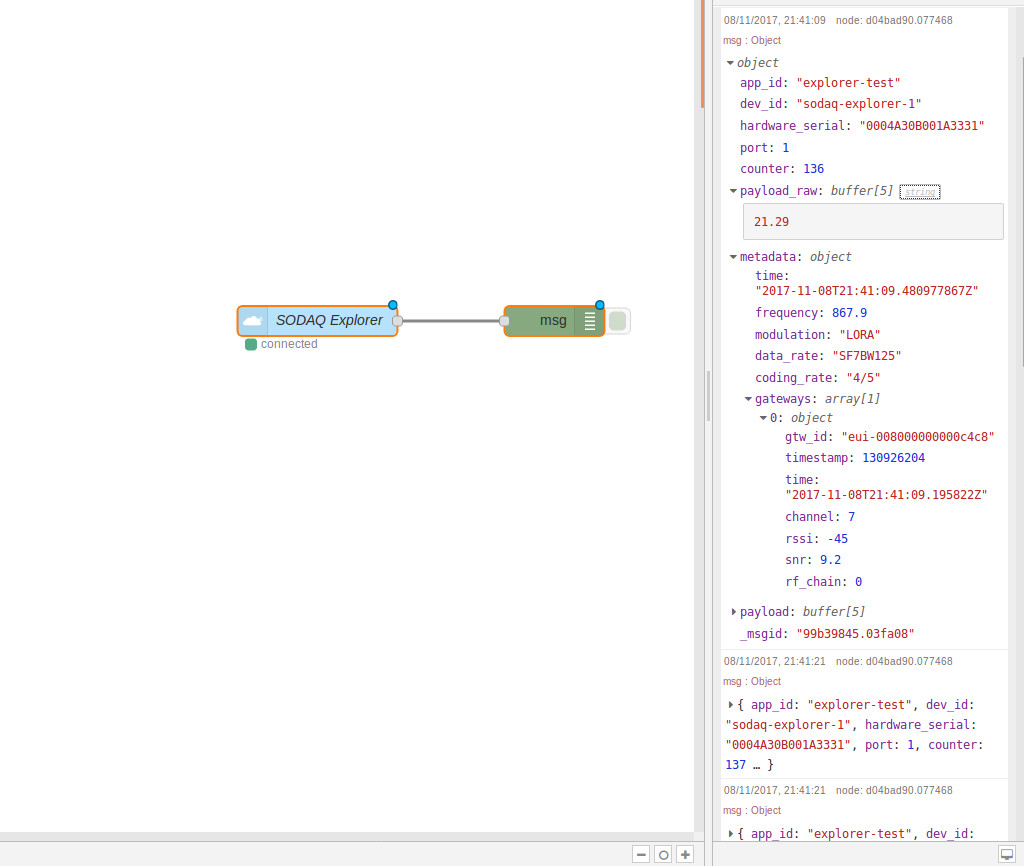
If you wanted to build on the simple temperature sensor example and rapidly prototype an application, a great way of doing this would be via Node-RED, which has input nodes for The Things Network, along with a bountiful ecosystem of others for input, output and processing etc.
In the image above we can see a TTN input node, which only had to be configured with an App ID and Access Key in order to start receiving messages. This was connected to a Debug node set to print out the entire message object, instead of just the payload and thereby providing lots of additional metadata which could be incredibly useful in many applications. From here we could very quickly and easily integrate with HTTP APIs, E-mail, Twitter, various databases and so forth.
First impressions
The Explorer is a well thought out little board that should be well suited to workshops — in particular where not everyone has real programming experience — enabling participants to get up and running quickly with putting LoRaWAN and simple applications to the test. Although there is only a temperature sensor on-board, others could be connected up with ease and the Arduino ecosystem provides support for many different types.
Other features not explored here and which are nice to have on-board are crypto support and Bluetooth, enabling experimentation with using additional layers of security and integration with other common devices, including smartphones, tablets and COTS wireless sensors.
Finally, one intriguing example that we didn’t get to try out and which sounds like it could be fun uses multiple Explorer boards with the RN2483 configured in plain LoRa (non-WAN) mode. Developed by interns at SODAQ, a range of almost a kilometre was achieved with one of the boards in the P2P configuration buried underground to a depth of 30cm!

Andrew Back has in excess of 20 years industry experience that spans IT infrastructure, telecommunications and electronics, and covering R&D through to architecture, strategy and governance.