Creating a new bootable Micro SD card, building a custom Poky Linux system, and running Debian on the world’s first RISC-V-based, Linux-capable development board.
The HiFive Unleashed was unveiled back at FOSDEM only a matter of months ago and so, unsurprisingly, it’s still relatively early days for Linux distribution support. However, as we’ll come to see, it’s not difficult to get up and running with an embedded build system and thanks to emulation having been available for some time, proper distro support shouldn’t be that far away.
Hardware
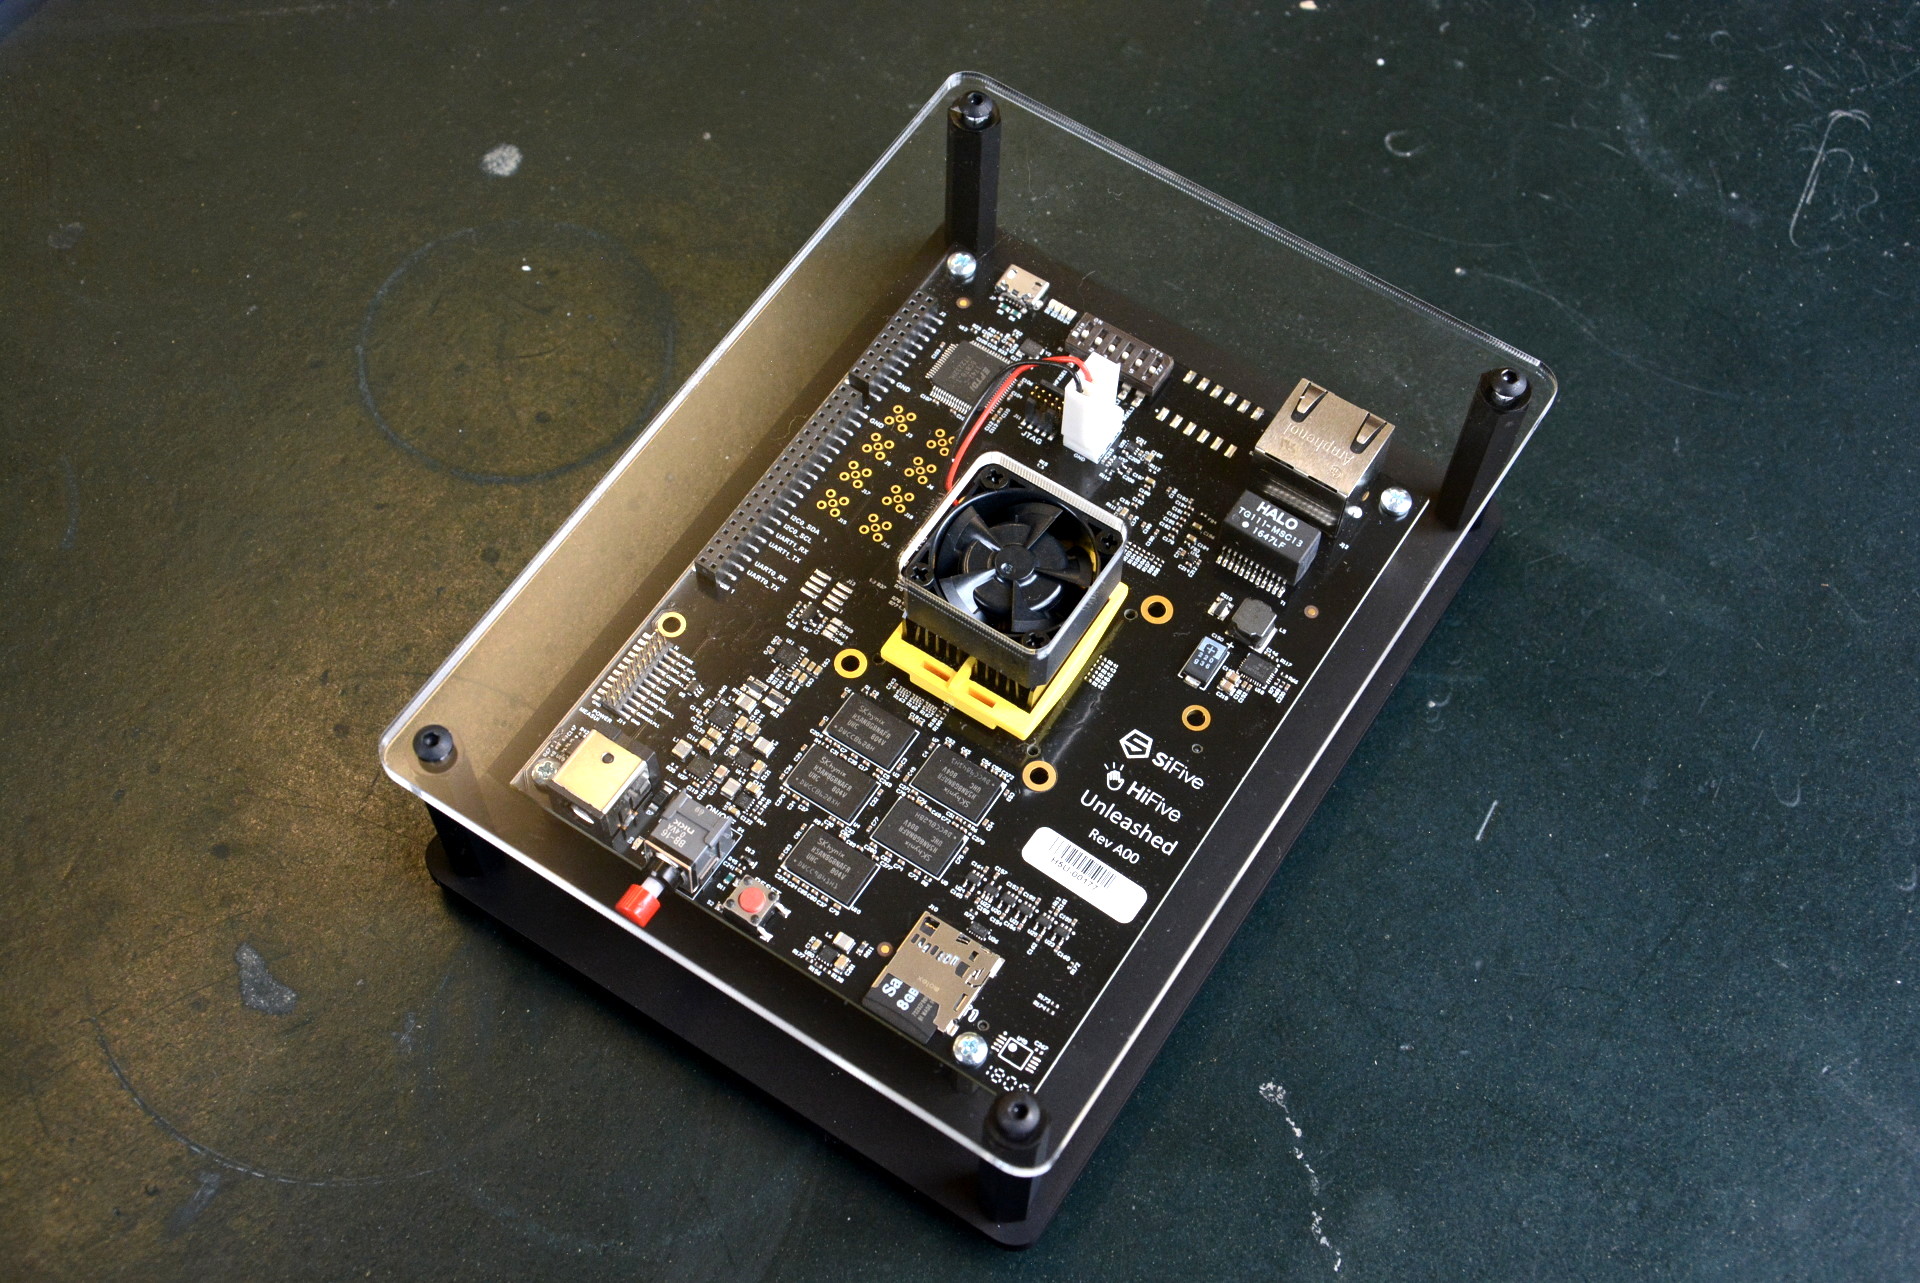
One of the first jobs was to make a simple case to protect the board.
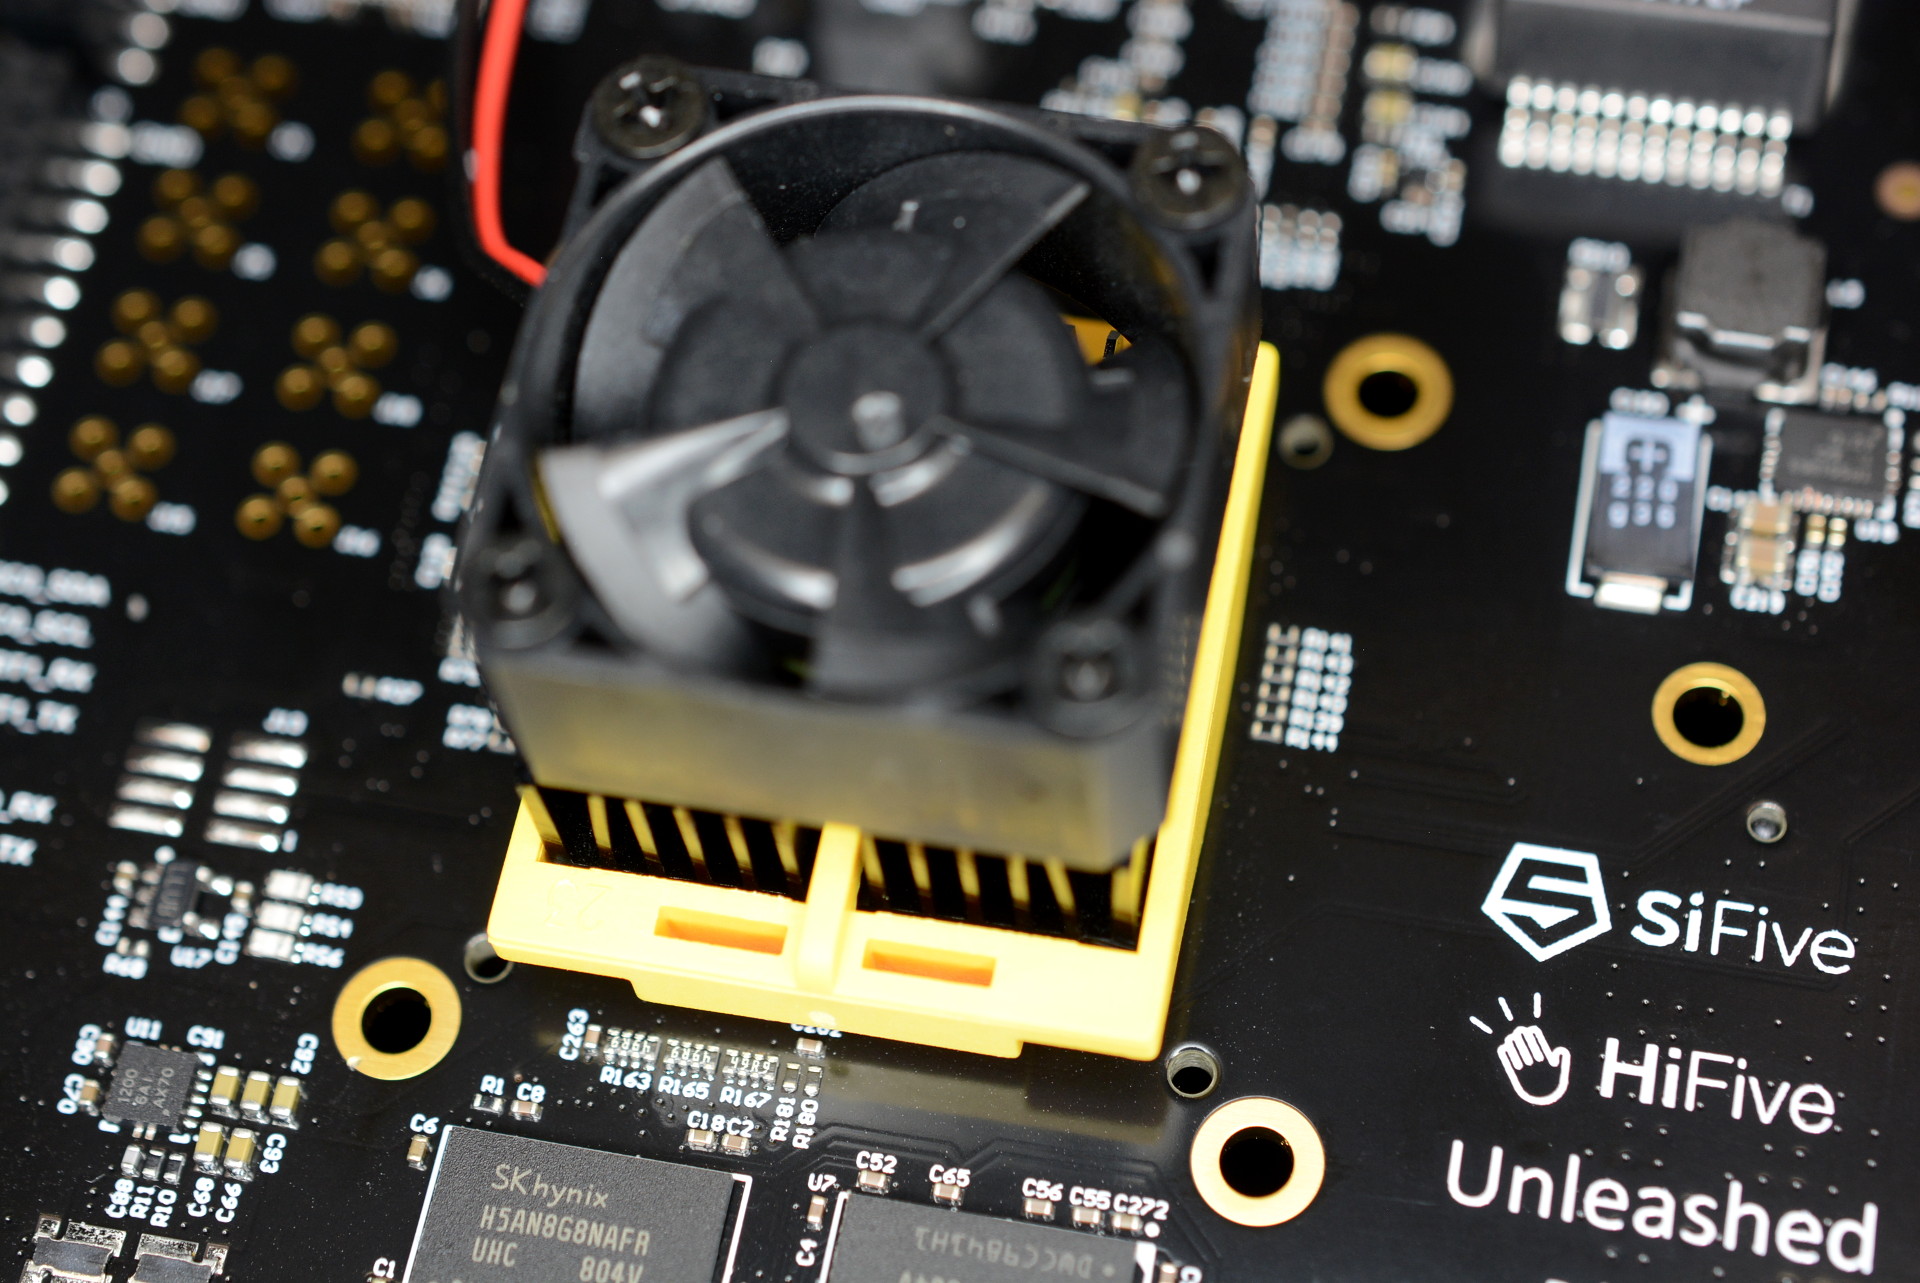
Before we get on to booting and building new Linux systems, a few initial observations on the hardware delivered via the Crowd Supply campaign.
Perhaps the first thing you notice when compared with the board shown at FOSDEM is the lack of SMA connectors, but these are likely only of use in serious hardware debugging — such as during board bring-up — and could presumably be fitted if required. Meanwhile the CPU fan is an obvious addition and while this may not always be necessary, it appears that it is advisable if running the processor at full tilt, and is a sensible precaution during development in any case.
Other changes include the gender of the low speed expansion connector, which is now female instead of male — less easy to accidentally short? One of the DIP switch banks is now a no fit. There may be other changes also.
Included SD card
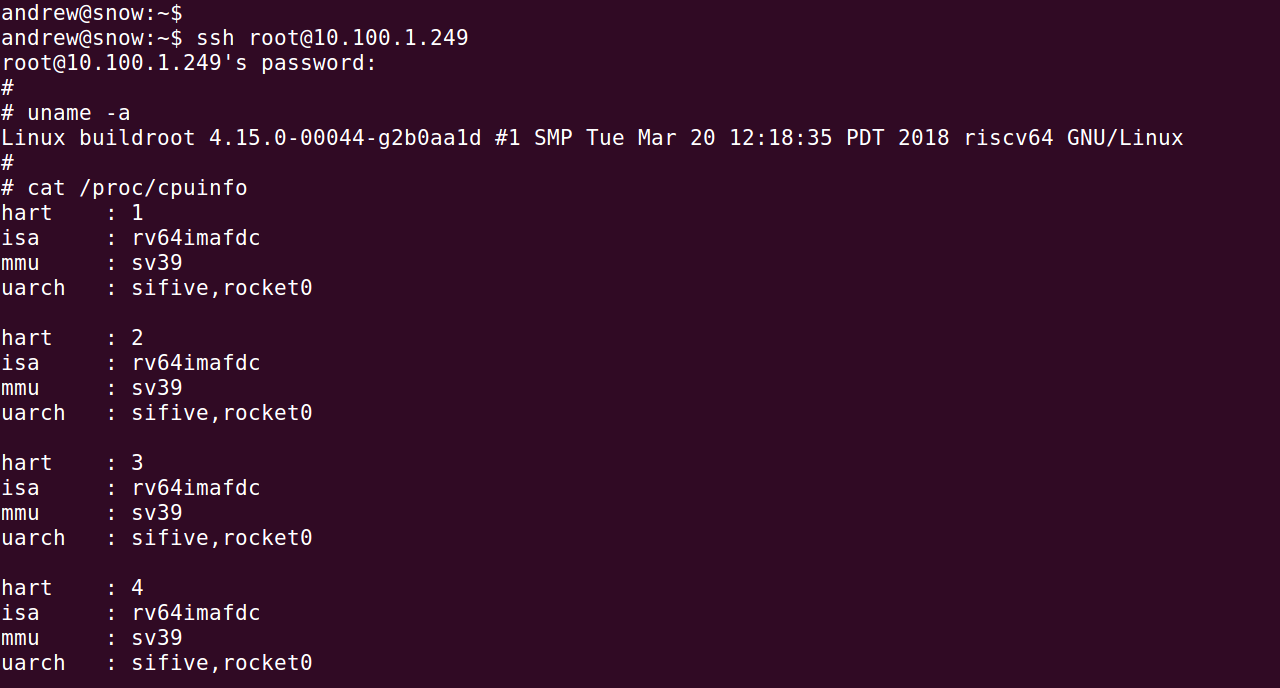
The board came supplied with an 8GB Micro SD card. Upon powering up with this inserted the HiFive Unleashed will get an IP address via DHCP and if you have a USB cable connected also, boot messages will be output on the 2nd port of the USB UART, /dev/ttyUSB1. Once the system has booted it’s then possible to log in via SSH, or a TTY on the aforementioned UART port.
Once logged in Busybox is used to provide a shell and a minimal Linux system is available. If we check the SD card partitioning we see that p1 is a 32M boot partition, with the remaining space allocated to p2 for a user provided root filesystem.
If you’re used to booting Ubuntu or similar it may come as a little bit of a shock to be greeted by such a minimal system, but let’s not forget that: 1) it’s early days; 2) embedded build systems tend to give you more control over precisely which versions of software get baked in and; 3) many key RISC-V/Linux use cases will be based upon custom integrated hardware, O/S and applications.
So, how do you build a new Linux system?
Buildroot

The Freedom Unleashed SDK integrates simulators, a GNU Toolchain, Linux kernel, and Buildroot — a tool that enables the building of Linux systems via cross-compilation. This is highly configurable and comes with support for building images that integrate all manner of commonly used software — from Apache and Asterisk, to Kodi and X11. Plenty of documentation is provided and this also details how to add new packages.
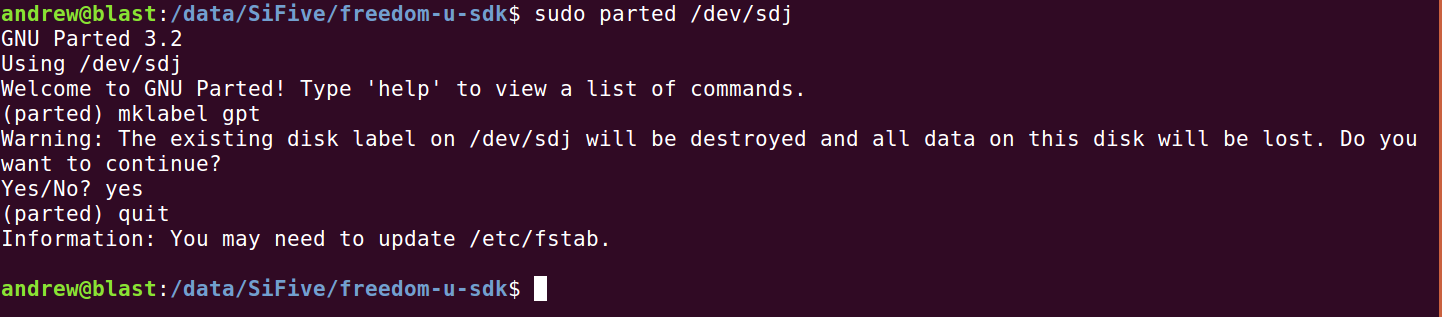
With the dependencies installed and the SDK sources cloned, building a bootable image is as simple as typing make. Once this is done it needs to be written out to a Micro SD card. Again we do this with make, but this time using a non-default target and taking care to specify the correct device.
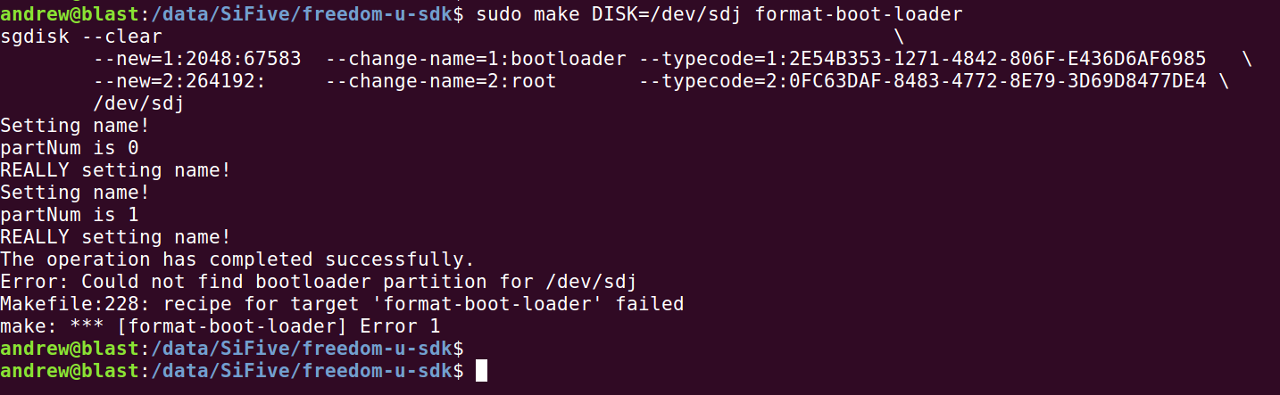
OK, so it seems we need a GPT disk label first.
Fingers crossed this time.
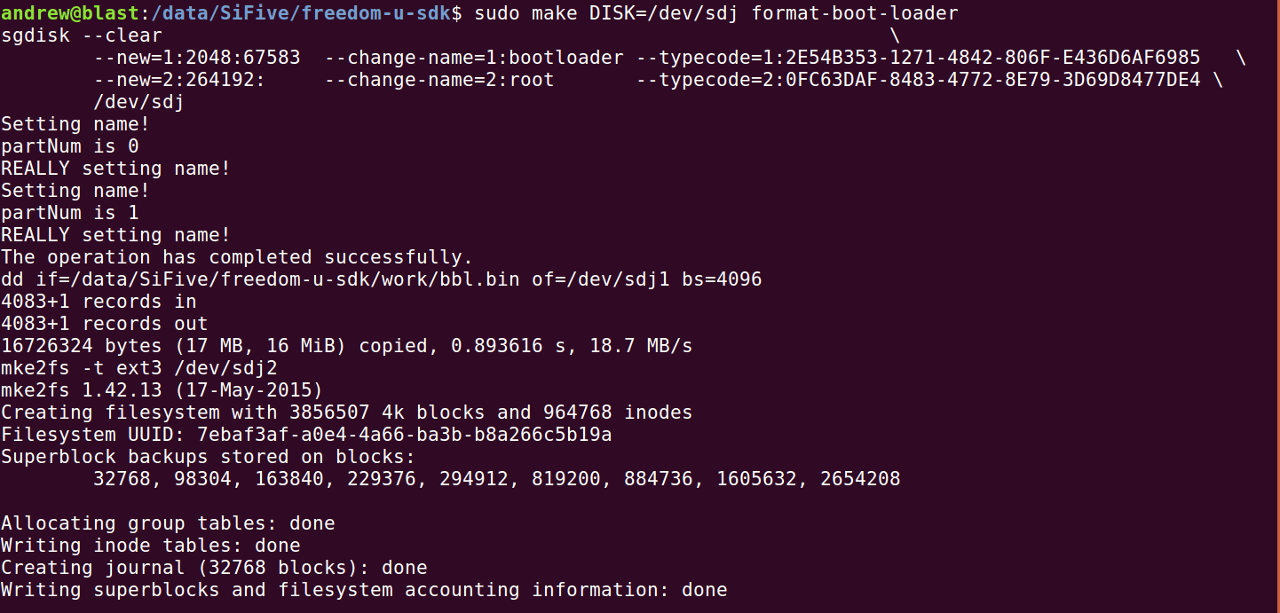
Success!
At this point I should note that I hadn’t actually read the documentation and later discovered that a similar disk label preparation step is included in the HiFive Unleashed Getting Started Guide.
If we now check the disk partitioning.
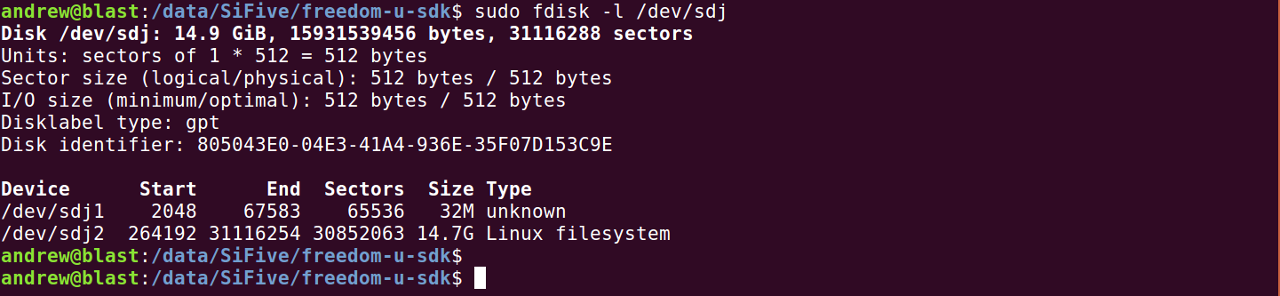
We have a similar layout to the provided card, except in this case a 16GB Micro SD was used and so the root partition is much larger.
So what do we do with this empty partition?
Yocto
The Yocto project operates under the auspices of the Linux Foundation and “provides templates, tools and methods to help you create custom Linux-based systems for embedded and IOT products, regardless of the hardware architecture.” Poky is a reference distribution of the Yocto project and described as “a working example of how to build your own custom Linux distribution from source”, it is used by commercial organisation to create custom embedded Linux systems for products.
Poky combines the OpenEmbedded Build System with metadata to make it relatively easy to build your own bespoke Linux distribution, via a layered approach that fosters modularity and reuse, while supporting a high degree of customisation for different architectures and models etc.
If Buildroot doesn’t provide what you need, there is a good chance that Poky will.
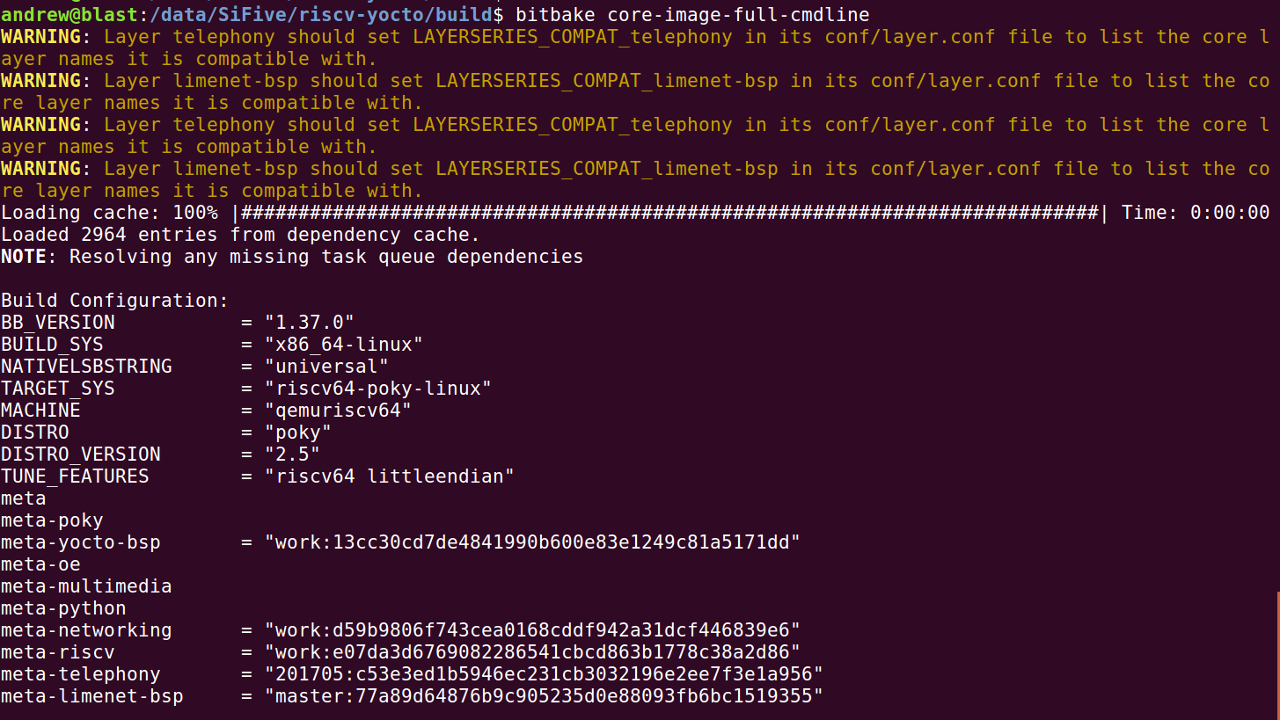
A Yocto layer named meta-riscv is used to provide support for the RISC-V architecture. The repo tool from Android is used together with a manifest to synchronise the git repositories for the various components required. Once the repos have been synced it’s just a matter of running a script to set up the build environment, before then executing bitbake. A little while later we have a filesystem image that can be run via Qemu, or the contents copied out to the 2nd partition on our SD card.
The first time you do this it will take a little while longer as the sources for everything are downloaded and built. Once completed the generated filesystem images will be in build/tmp/deploy/images/qemuriscv64/. Having transferred the image from the build server to a laptop with the Micro SD card inserted, the contents were copied onto this with:
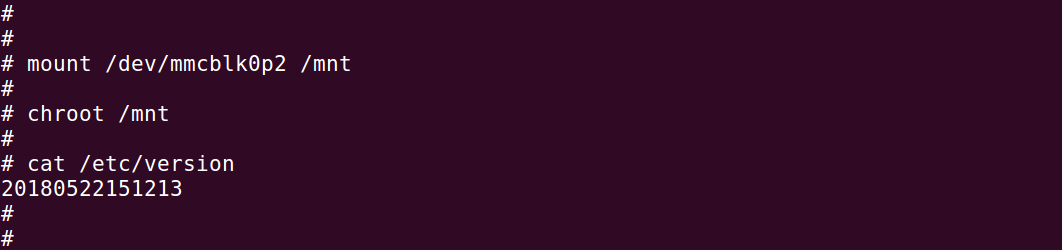
$ sudo mount -o loop core-image-full-cmdline-qemuriscv64-20180522151213.rootfs.ext4 /mnt/image

$ sudo mount /dev/mmcblk0p2 /mnt/sd

$ sudo cp -ax /mnt/image/* /mnt/sd
Following which the card was inserted into the HiFive Unleashed and booted. Once logged in we could then chroot into the freshly generated Poky system.
Need to include additional software in the image that’s not in OpenEmbedded Core?
- Clone an existing layer or create a new one.
- Update build/conf/bblayers.conf to include the layer.
- Add lines CORE_IMAGE_EXTRA_INSTALL += “thing” to build/conf/local.conf in order to include software from the layer in the image.
It should be noted that by default, the setup.sh script will clear out the build directory each time it is run, meaning that everything would need to be built all over again. One option if you have a build server is to leave a session running via screen or similar.

Alternatively, the line in setup.sh that clears out the build directory can simply be commented out.
Initial distro support
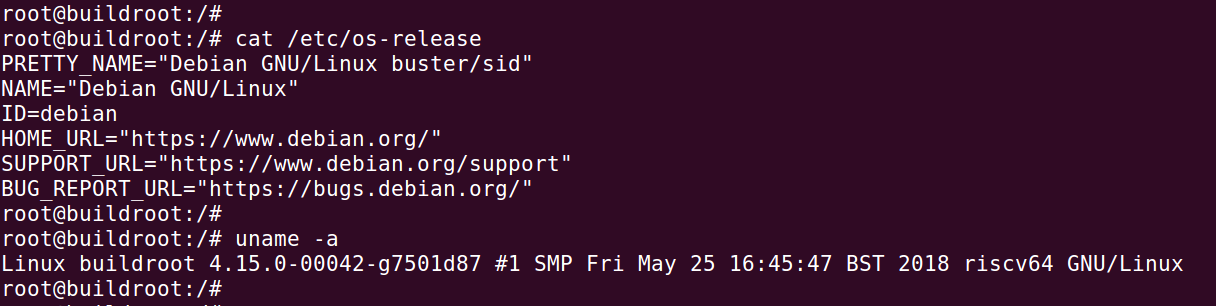
Back in early April an official Debian port for 64-bit RISC-V was announced and the Debian wiki has details, including information on the port status, along with links to the developer mailing list and pre-generated filesystem images that can be downloaded. Getting up and running with these via chroot is simple enough and within no time you can be installing packages via apt.
Similarly, the Fedora Project provide information on their port also, with status information and disk images also made available.
Summing up
It’s great that we now have a Linux capable development board for 64-bit RISC-V in ASIC, with features including plenty of RAM, gigabit Ethernet and flash storage. Everything is in place to start right away generating a custom Linux system plus applications via Buildroot and Poky. Meanwhile mainstream Linux distro support appears to be progressing at a reasonable pace.
We’ve not touched here at all on, for example, the boot process and its configuration, ability to debug via integrated USB/JTAG and OpenOCD, or expansion options. Speaking of which, the soon-to-start-shipping official expansion board from Microsemi will bring PCIe, SATA, HDMI and whole lot more — including a 300K logic element PolarFire FPGA.

Andrew Back has in excess of 20 years industry experience that spans IT infrastructure, telecommunications and electronics, and covering R&D through to architecture, strategy and governance.